Toner Cartridge Refill Instructions
There's a secret that printer manufacturers don't want you to know:
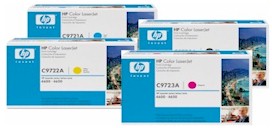
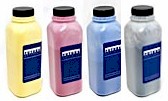
- You can refill toner cartridges 2 to 5 times and get great print quality -
 |
vs |
 |
Click Here to find the right Toner Refill Kit for your printer
When your toner cartridge print starts to become faint, it's not because your cartridge has worn out - it's because you're out of toner. Your cartridge will
wear out over time, but cartridges are built well enough to last much longer than their stated yield. The secret to extending their life is to know where to add toner, and to only use toner which is a precise match to the
toner which came with your OEM cartridge. Each cartridge is manufactured to work with a specific weight, grain size, and
chemical type of toner, and will not work with anything different.
Toner Refill Instructions
(specific instructions come with our toner refill kits)
|
First, locate (or make) a fill hole
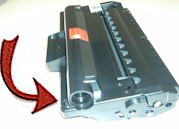
Your cartridge has a 'holding tank' which holds the toner powder. Some cartridges already have a hole (Figure 1) which is
is filled with a plug. Our refill kits for these cartridges contains illustrated instructions and directions for finding and opening this fill hole.
Other
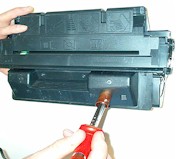
cartridges, however, don't have a 'fill hole' so you'll need to make one yourself. Our refill kits for these types of cartridges come with a burn tool which is used to burn (actually melt) a fill hole in the cartridge (Figure 2). Our refill instructions
will show you exactly where to make the fill hole (you don't want to make it in the wrong spot). A burn tool come standard in all refill kits for
cartridges without factory-made fill holes, and can also be purchased separately on our accessory page.
Second, fill the cartridge with the right toner.
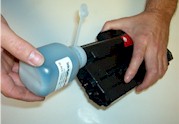
Once you have the hole you use it to 'pour' toner into the cartridge's toner hopper (Figure 3). The toner which
comes with our refill kits is manufactured specifically for the cartridge it was ordered for - we don't have 'generic' or 'universal' toner.
Your kit comes with a funnel cap which screws on top of the toner bottle and
you use this to add toner to the cartridge without any mess. You don't want to shake or squeeze the bottle because this can spray toner powder all over the place. Just press the funnel cap gently against the fill hole and
gently tap the side of the toner bottle until the bottle is empty.
Third, reseal the fill hole
The last step is to reseal the fill hole. If your cartridge had a pre-made fill hole you simply reinsert the plastic plug that you removed earlier.
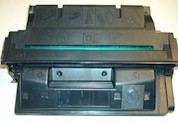
Refill kits for cartridges where you have to burn a fill hole come with our special aluminum tape, which you use to securely tape over the hole (Figure 4). Gently
shake the cartridge to evenly distribute the toner and reinsert into your printer - it's that easy!
NOTE - Some newer cartridges have 'smart chips' or fuses which need to be replaced in order for the cartridge to function past its 'expected' life. DON'T WORRY. We stock these
chips for those cartridges which require them (Click Here for our complete list of replacement chips), and they are included in the refill kits for those specific cartridges, along with easy instructions for changing the chip or fuser.
We stock over 200 different low-cost compatible toner cartridges and over 200 different types of toner
powder
Find the Right Toner Refill Kit for Your Printer
Bulk Toner Listing | Replacement Chips Listing
|
|
|
|
Figure 1
An example of a cartridge with an existing fill hole
|
|
|
|
|
Figure 2
Burning a perfect fill hole using our hole-burning tool
|
|
|
|
|
Figure 3
'Pour' matching toner powder into the cartridge
|
|
|
|
|
Figure 4
Seal hole with aluminum tape (pictured) or with plastic cap
|
|
|


